
In my first article on this site I want to show you how easy it is to reimage Dell VxRail Nodes nowadays. I assume you already have heard about VxRail. Everybody in the data center industry should know by now 😉
If you are more familiar with VxRail you surely have heard about the RASR process. I won’t explain it in detail here but I will try to do it quickly. RASR aka Rapid Appliance Self Recovery is a way to do a factory reset and/or a complete upgrade of a VxRail Node (incl. ESXi, iDRAC, BIOS, Firmware and also Services VMs like VxRail Manager, vCenter Server etc.).
Until recently the RASR upgrade process had to be done manually in about 4 to 5 sequential steps on each individual Node. That was pretty time consuming and you couldn’t do many nodes in parallel. But since not so long ago you can do it in a new and much easier way using the automation capabilities of the NIMtool. I have done it the “old” way for quite a while and finally had the opportunity to try the new way in the last week before christmas. Continue reading the next sections if you want to know how it works.
// prerequisites
Create a SolVe Procedure (I highly recommend to create a new one every time):
https://solveonline.emc.com/solve/home/51
SolVe Online => VxRail => Install => Restricted Procedures => Select your VxRail Appliance Model
Everything is explained very well in the procedure. But if you don’t have the time or the necessary access you can follow my post. If the procedure changes radically in future I will try to update my post as soon as I can.
The VxRail Nodes must be on the Supported Platform list (14G or later).
The target version of NIMtool 1.3.1 can be 7.0.240 or later.
The iDRAC version must be 3.34.34.34 or later.
You need a JumpHost where you will run the NIMtool (in the following I will talk about using Windows).
It must be available for the whole time of the imaging process!
It should be running Windows 10 or Windows Server 2016.
It must be able to reach the iDRAC IP adresses of the Nodes that you want to reimage. Ideally it has an IP on the same iDRAC subnet, if not it could be necessary to open some firewall ports. (check the Issues section in the procedure)
PowerShell should be on Version v5.1.19041.1237 or later.
The PowerShell console must run the whole time of the imaging process! If you close the console the imaging process gets killed and you risk a firmware update failure!
Download the suitable NIMtool zip file from the Dell Site:
https://www.dell.com/support/home/de-de/product-support/product/vxrail-software/drivers
VxRail Software => vxrail-nim_windows-x64_<…nim-version…>-bundle_<…vxrail-release…>.zip
Decompress the zip file locally on the JumpHost.
// preparations
Open the PowerShell as Administrator.
The PowerShell Execution Policy must be “Remote Signed” for the current user:
> Set-ExecutionPolicy RemoteSigned
Import the VxRail.NodeImage PowerShell Module:
> Import-Module “<…path-to-file…>\vxrail-nim_windows-x64_<…nim-version…>-bundle_<…vxrail-release…>\nim_release\vxrail-nim_windows-x64_<…nim-version…>\VxRail.NodeImage”
Create a SMB file share:
> New-SmbShare -Name ‘nim_share’ -Path ‘<…path-to-file…>\vxrail-nim_windows-x64_<…nim-version…>-bundle_<…vxrail-release…>\nim_release’ -Temporary -ReadAccess ‘Everyone’
// dry-run
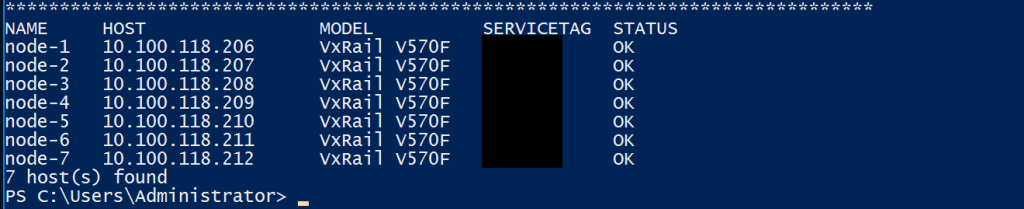
I recommend to do a dry-run first! It is a very helpful way to see if the whole process will work correctly:
> NIMTOOL -dryrun
=> inputs are:
- Path to the ISO on the SMB fileshare
- User (and Password) who has access to the fileshare (check the exact usage with two backslashes)
- iDRAC IP adresses of the Nodes
- iDRAC User and Password

If all the checks are good it will look like this after a few minutes:
// imaging process
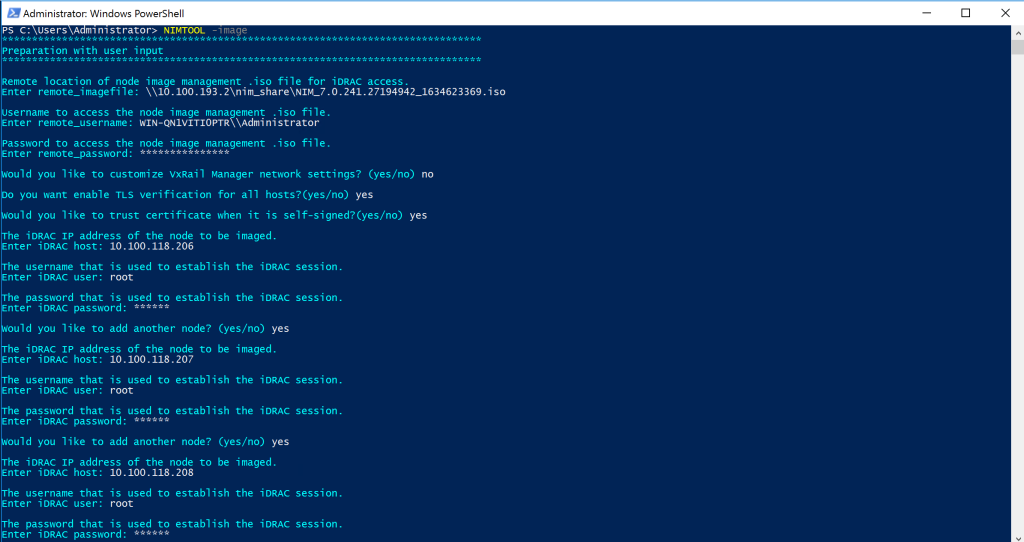
To start the imaging process on one or more nodes you use the following command:
> NIMTOOL -image
=> inputs are:
- Path to the ISO on the SMB fileshare
- User (and Password) who has access to the fileshare (check the exact usage with two backslashes)
- iDRAC IP adresses of the Nodes
- iDRAC User and Password
After nearly 3 hours my 7 VxRail Nodes were ready for deployment. Everything worked like supposed to 🙂
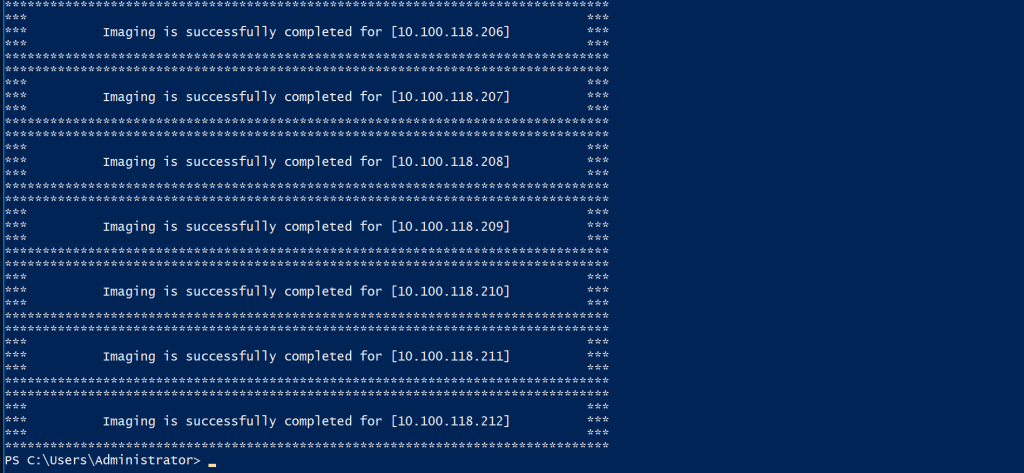
In conclusion, the NIMtool works greatly and improves the whole VxRail imaging process even if you are just reimaging one Node. From now on I will definitely use it every time I can. Happy imaging!
If you have read up to this point, I hope my article was helpful to you. Feel free to share if you like…
// footnotes
Date: 04.01.2022
Version: 1.0
Hello ,
Thank you for the procedure.
Is it faster to do so than doing by cmd and do ”vxrail-nim.exe — setup” , ”vxrail-nim.exe” — validate , ”vxrail-nim.exe — all ” ?
Never tried yours yet 😉
Hi,
This is a great find for me. Do you know if there’s a tool like NIM tool for VxFlex/PowerFlex?
Thanks,
Steve O’
Hi Steve,
I don’t know a tool like that for PowerFlex. But I think the NIM tool will be available for the new APEX Cloud Platform for RedHat OpenShift Nodes (called MC-760 etc.) which are using PowerFlex technology, because I have seen that the NIMtool is available for the APEX Cloud Platform for Microsoft Azure Stack HCI Nodes.